Showing posts with label DIY. Show all posts

Thursday, 11 April 2013

Embellished Sunglasses-DIY

Embellished Sunglasses
Let's make some pretty sunglasses, whoooooop!

You will need:

- A handful of pretties :) (diamante, beads, pearls- preferably flat back but I just used normal)
-UHU or some super glue
-Patience
-Sunglasses
-*Optional* Tweezers

Before you start plan out where you are going to put everything, probably symmetrical but the choice is yours.
Carefully squeeze out a small amount of glue where you are putting you first embellishment. If your embellishments are small and fiddly maybe you should use tweezers to pick up and place them.

To make these sunglasses I suggest buying some cheap sunglasses mainly just in case they get ruined also why buy some super expensive when you are going to change them x
Maybe get them from somewhere like a goodwill/charity shop or thrift store. :) Mine were £1.99.

Look how jazzed up they are :D
After

Before 


It's not like there's no filter on the before of anything, pffft... no :D. But adding pearls has slightly altered the shape of the frame to more of a cat eyes pair but that's good :P

The glasses in the collage are from boohoo.com, topshop and ASOS, for more information check out my polyvore , in case you don't want to give this a go :c. If you do want to give this a go and don't mind please e-mail your finished pair, I'd love to see.
                                      Ciao, Rani Apple x


DIY- T-shirt Scarf

Today I'd like to show you how to make a quite light weight upcycled scarf. :) My t-shirt is a size 22 and was £2.99 from a charity shop.


You will need :

- A pair of large/fabric scissors
- A knitting needle or a stick
- An unwanted t-shirt (the bigger the better)
-*Optional* Small scrap of leather or contrasting material

First cut closest to armpit to armpit, don't chuck this away you may need it later. x


 Now cut across in the same direction, (make sure you a doing it from closed edge to closed edge) cut about half a centimeter down to the otherside leaving an about 2cm gap.
To cause less hassle later on, stick the needle through the t-shirt and carry on cutting the strips.

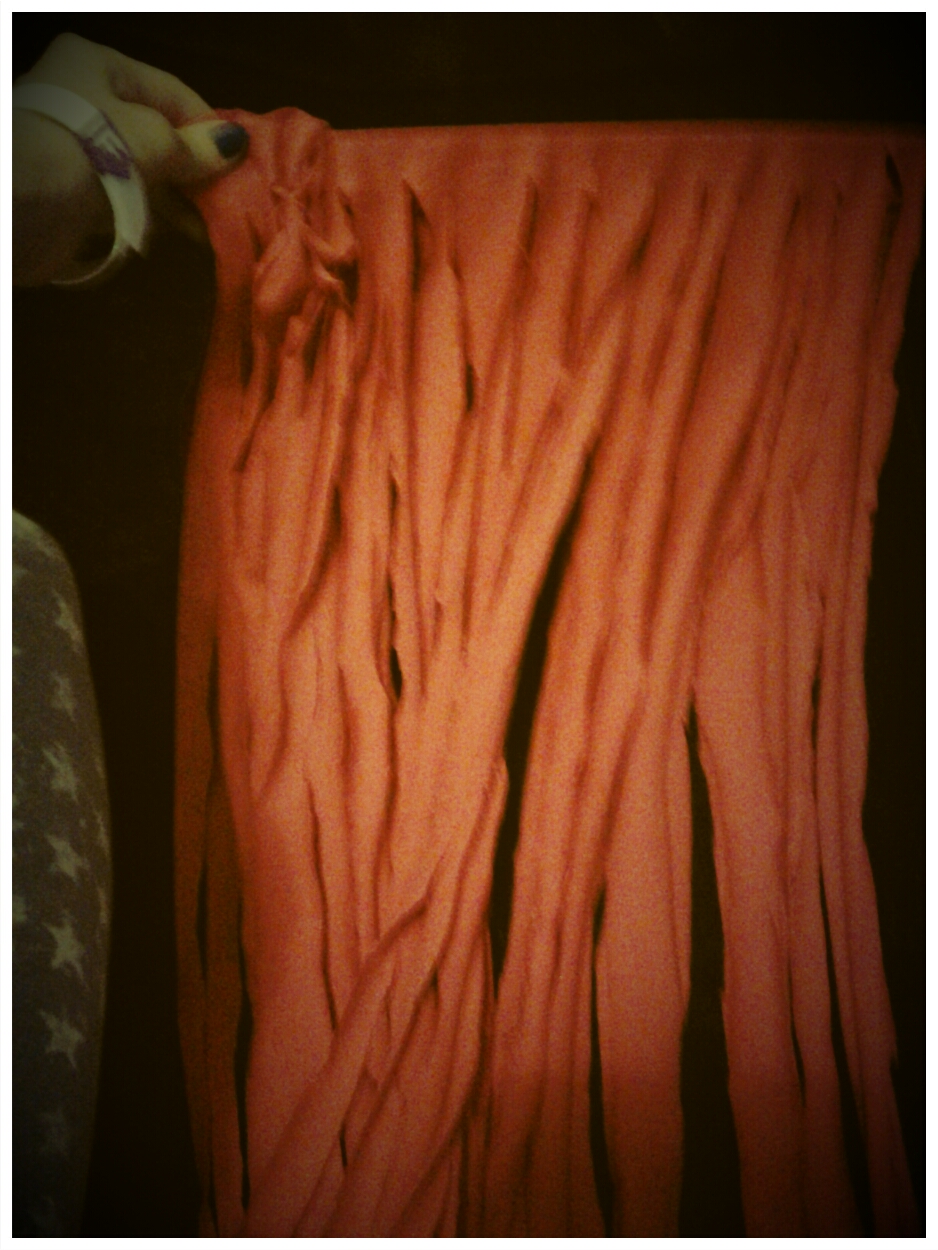
Once you have got to the end pick up the work by the needle with on hand and with the other gently tug at the strips so that they curl into little tubes. You may need some one to help you do this. :)

From the rest of the t-shirt you left earlier cut a reasonably long and thick strip.
Holding the strip put your hand through the hole held by the needle.
Now wrap the strip several times around and finish with a neat not and tuck in the ends.

You should now have a long tube :) If you have the optional fabric/leather you can sew a small amount around the other end to stop you scarf getting tangled so easily.
I hope this tutorial isn't confusing at all please let me know if you get stuck and it needs rewording. This DIY is a good one to do on a boring day. If you try this I'd love to see your finished product my e-mail is on the Contact page x
Ciao Rani Apple x

Sunday, 20 January 2013

Jelly?


I recently discovered this super cute Japanese magazine, called Jelly, full of photo shoots, tutorials and new trends. I just love it but cannot find a way to order them without it being quite pricey. Hopefully there is away of getting a subscription to the U.K or anywhere else. So I will let you know when I can get it in print and paper ;).

*RANDOM SUBJECT CHANGE* Go with it ;)
I know there not still trending but I can't get over how cute clear clutches are. So, I made my own. They look cute with or without a colourful purse inside.                                
You will need:
  •  An A5 Clear storage container
  • A cute/vintage drawer handle
  • A power drill
  • A spacer/washer
  • Craft knife/Scissors
  1. First Mark out on edge of inner box where the handle will be!
  2. While keeping box steady and fingers WELL away carefully drill the hole through. DON'T go too fast or it will cause the plastic to shatter.
  3. Next screw in the knob :/ Dirty minded! With the spacer inbertween.
  4. Once fastened mark out onto outer box a slot for knob to slide over.
  5. Again carefully, cut out the slot. The spacer means it is easier for outer box to slot under-neath the handle.
Does that make sense? RECAP! Mark where you will drill.Then carefully drill hole. Next fasten the knob. Mark and cut the slot onto the outer box. Voila! That recap was more for me than you 'cos obviously your more clever that me. XP
Ciao for now, Rani Apple x


Sunday, 13 January 2013

Graffiti

The other day my little brother was watching Jedward's big adventure and I couldn't help but notice their funky blazers. I searched all over trying to find who designed them (I still have no idea).
So I decided to make my own ;)

What you will need:

  • Old/cheap Plain hoodie
  • Spray Paints
  • Spray Glue
  • Grease Proof Paper
  • Aired/Open Space
  • Craft Knife
  • *Optional* Fabric Pens


First you will need to make a rough design. If text like mine decide on font. I chose military. Trace over the letters at size wished or print out onto paper.  
Once traced carefully cut out with craft knife, maybe ask an adult to help.
I also wanted a boom box for that urban feel. I decided to have that underneath the text. So lightly spray the glue onto back of base template and smooth out onto hoodie. Lightly spray across template and leave to dry. REMEMBER YOU CAN ALWAYS ADD AN EXTRA COAT BUT CAN'T REMOVE ONE.Make sure the first design is dry before painting the next. For the second layer you may not need as much glue because to jumper may still be tacky from the previous lot of glue.
Don't worry if the paint drips a bit it will give it a bit extra and look more graffiti like. On my second layer I went over a bit with a brush to thicken up my lettering and to make bolder. Here is my finished product for now I may add a bit more to it. Like go round the lettering with a thin red brush with a dark red which from this picture you can see I have already started a little.
I hope it works out for you. Maybe you could post or e-mail some of your graffiti hoodies.

Nail Art

I also came up with a graffiti nail art tutorial inspired by some other nail artist. I'm not the best at nail art but practise makes perfect, right? ;D

What you will need:

  • Pale colour nail varnish,
  • A dot and flick pen or a really thin paint brush,
  • Clear Top Coat
  • And a nail art paint.
  • *Optional* crackle paint

First choose the style of graffiti writing you are going to use. This is the one I chose good for a beginner.What is your text going to read? Mine read 'funky'. Paint about 3/4 of the nail roughly, starting at the tip.

Write out your word as f * u * n * k * y. The * is where you will be doing a pattern such as an arrow, a dripping love heart, paw print, splatter or even just crackle paint. For your first letter do it quite thick with the nail art paint.
 Then carefully go in the inside with the pen trying to keep a neat border but don't stress too much, is street art always really neat? On each of the * spaces I did a different pattern.
Tadahh!

Here are some graffiti style jeggins at £19.00 used to be £35.00, $33.42 was $61.57 River Island. Also some cute Banksy Products @ Clintons.

I hope you liked my DIY post x Ciao, Rani Apple x